An AR app in iOS for tracking a card


I would like to introduce making an AR app in iOS for people who already know ‘UIKit’.
The behavior of this app is below.
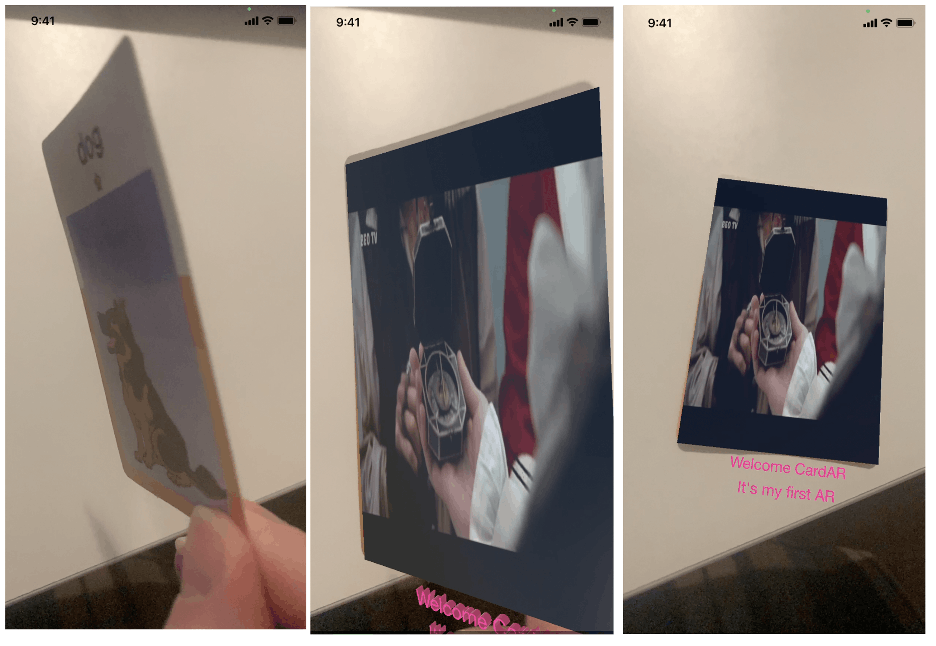
- Whenever this app recognizes a card whose image is stored in the app, a video clip with some texts plays automatically on the card. Below is the screen of the app running.
Let’s start it.
The work-through can be categorized into 5 steps below.
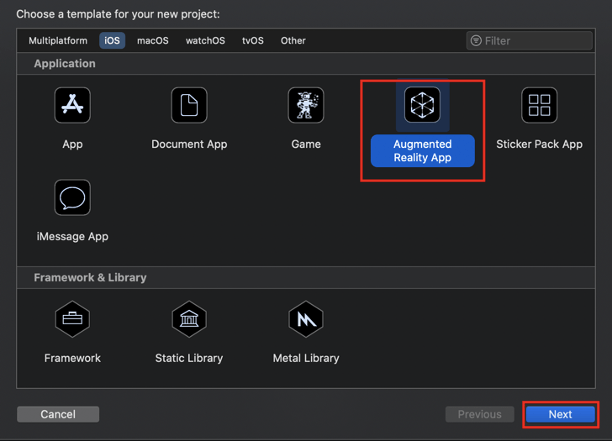
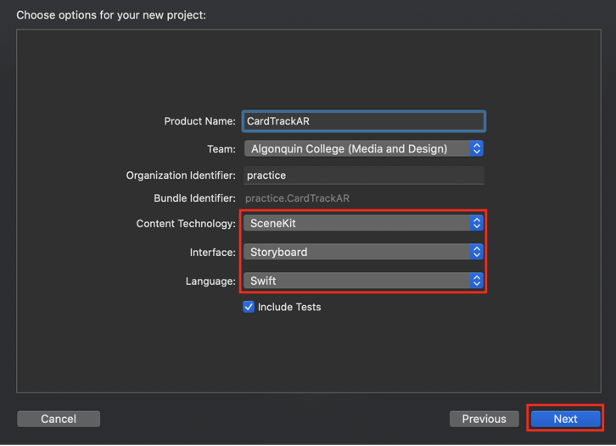
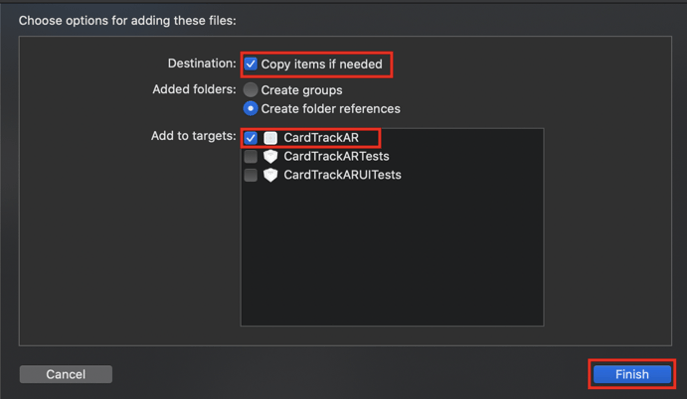
- Step1: To create a new project with the Augmented Reality App template.
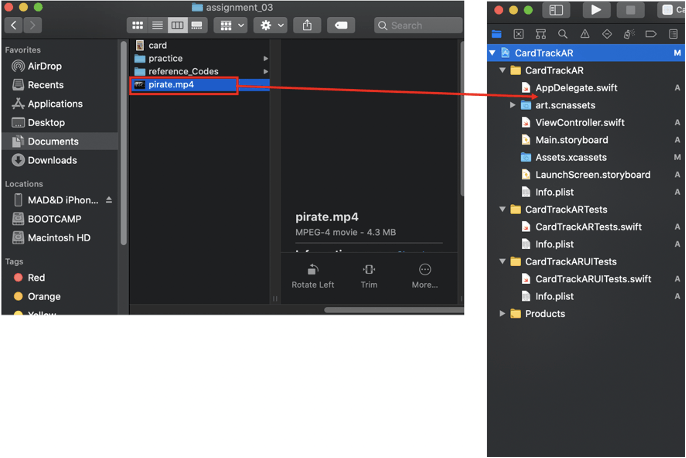
- Step2: To add a video clip to the project
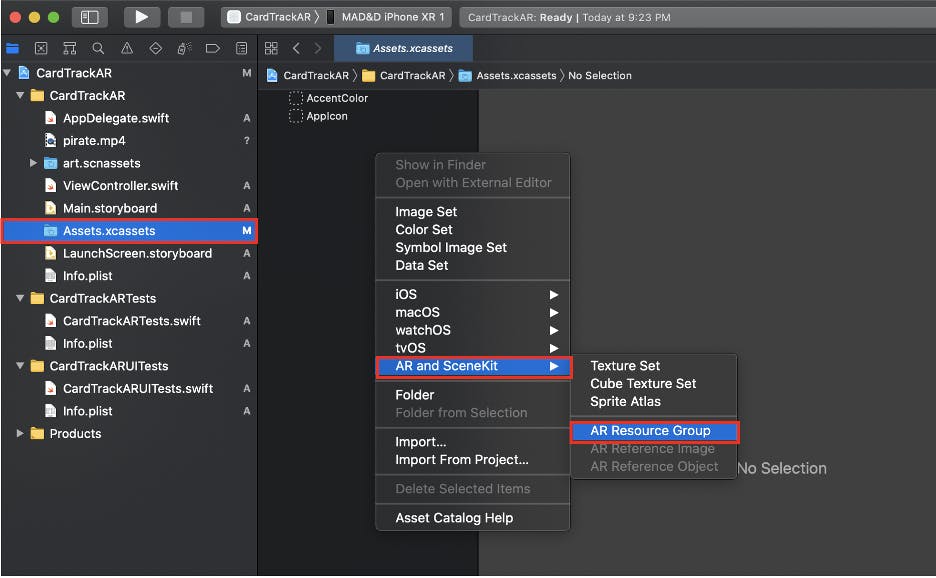
- Step3: To add a card image in AR resources of assets.
- Step4: To add objects displaying on the card in the scene graph
- Step5: To implement codes to recognize the card image and show objects on the card.
[Step1: To create a new project with the Augmented Reality App template]
[Step2: To add a video clip to the project]
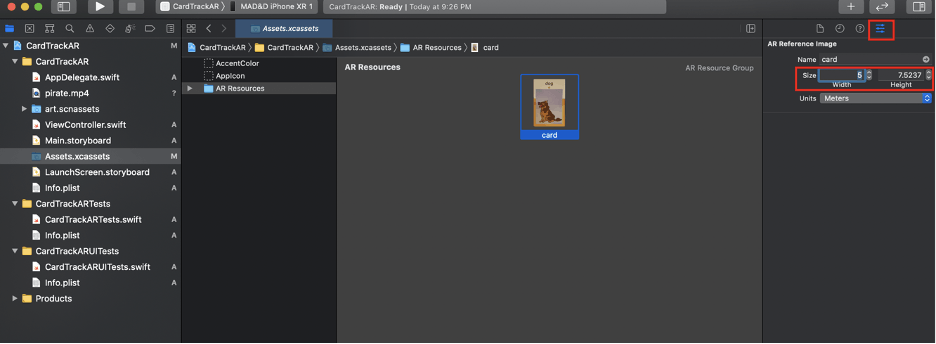
[Step3: To add a card image in AR resources of assets]

The size is set like below.
[Step4: To add objects displaying on the card in scene graph]
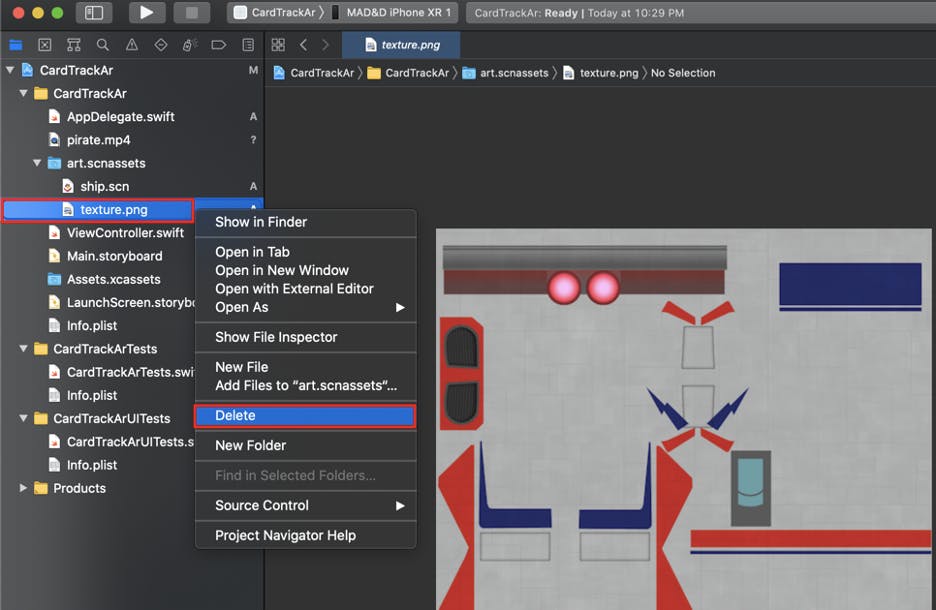
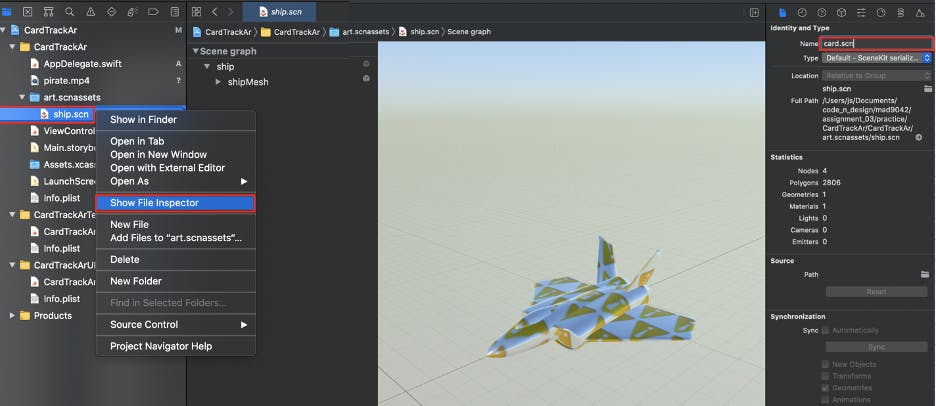
The Augmented Reality App template has ‘ship.scn’ and ‘texture.png’ in ‘art.scnassets’.
We will delete ‘texture.png’.
We will change the name of ‘ship.scn’ from ‘ship.scn’ to ‘card.scn’.
We will add an ‘Empty Node’ to ‘Scene.graph’.
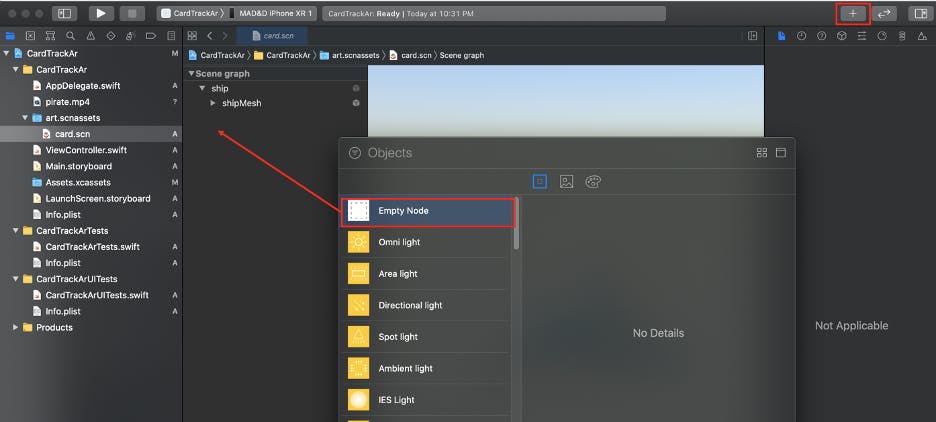
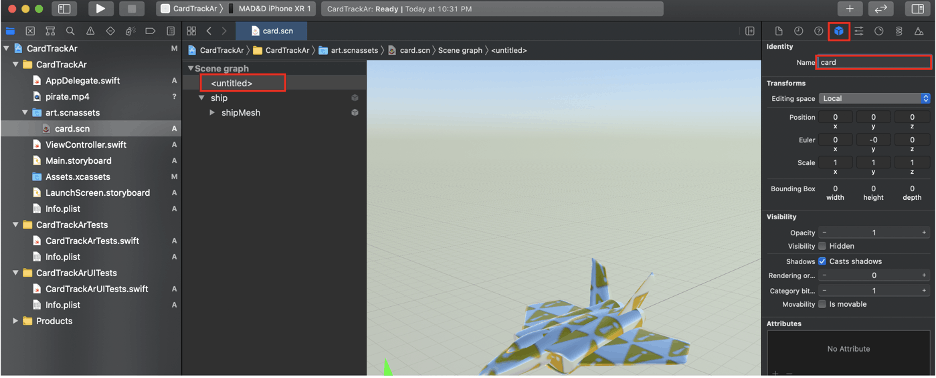
and, will change the name of ‘Empty Node’ from to ‘card’.
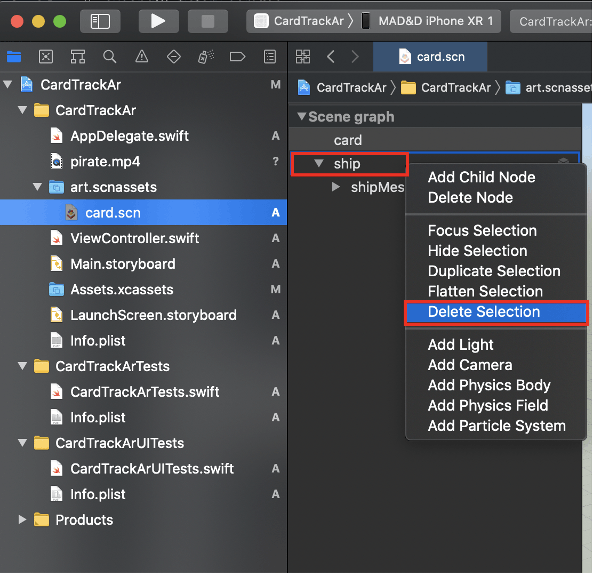
We will delete the ‘ship’ object.
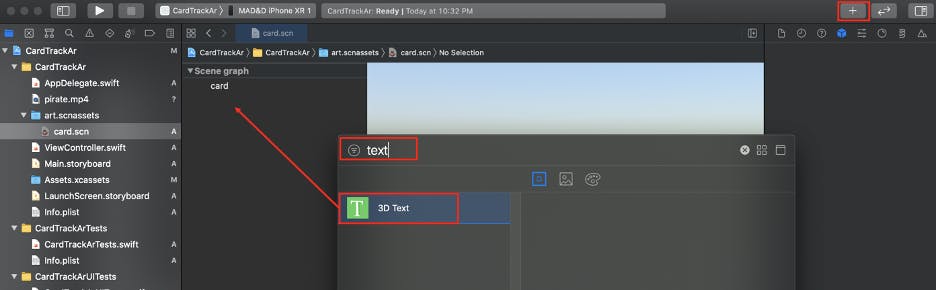
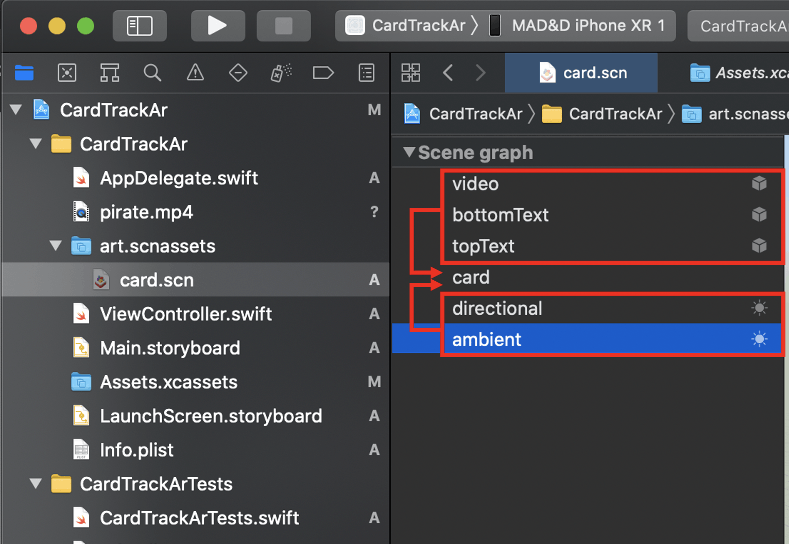
Now, we will add 5 objects: two text objects, one plane object, and two light objects.
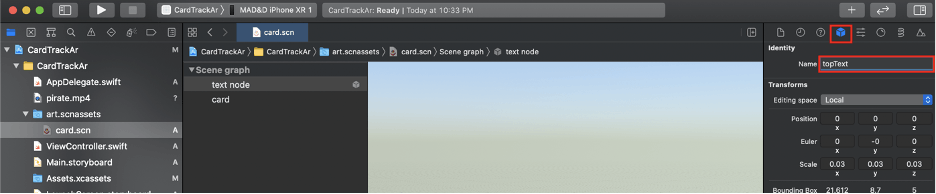
Firstly, we will add a text object, and then change the name of the text object and text of the text object.
- The name of the text object: ‘text node’ -> topText’
- The text of the text object: ‘text’ -> ‘Welcome CardAR’
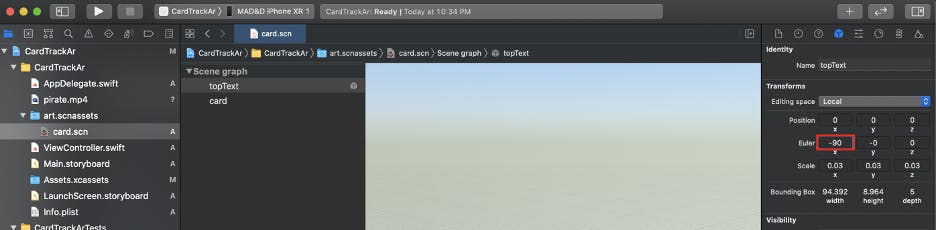
And then, we will change the Euler angle of the x-axis of the text objects from 0 degrees to -90 degrees.

Secondly, we will add the second text object. In the way of the first text object, we will change the Euler angle of the x-axis, the name, and the text of the second text object.
- The name of the text object: ‘text node’ -> ‘bottomText’
- The text of the text object: ‘text’ -> ‘It’s my first AR’
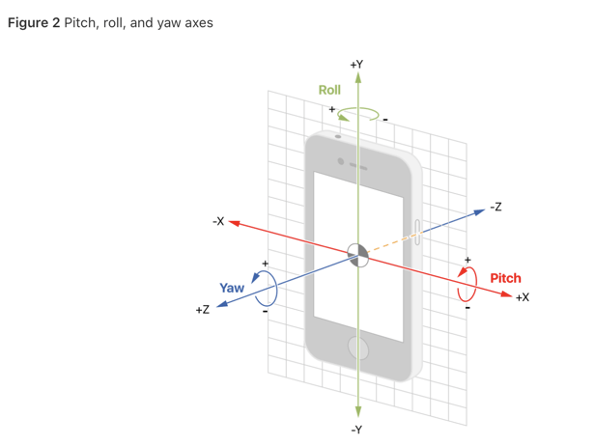
In order to understand the Euler angle, we can find information from ‘developer.apple.com‘ below.
- URL:
Because that the Euler angle of the x-axis of the text objects is set as ‘-90’ degrees, two text objects are lying.
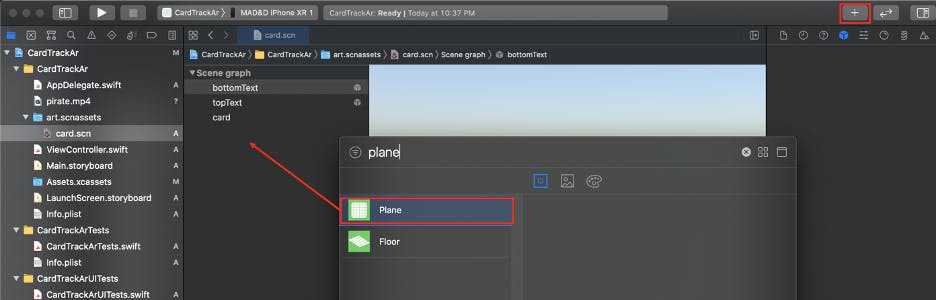
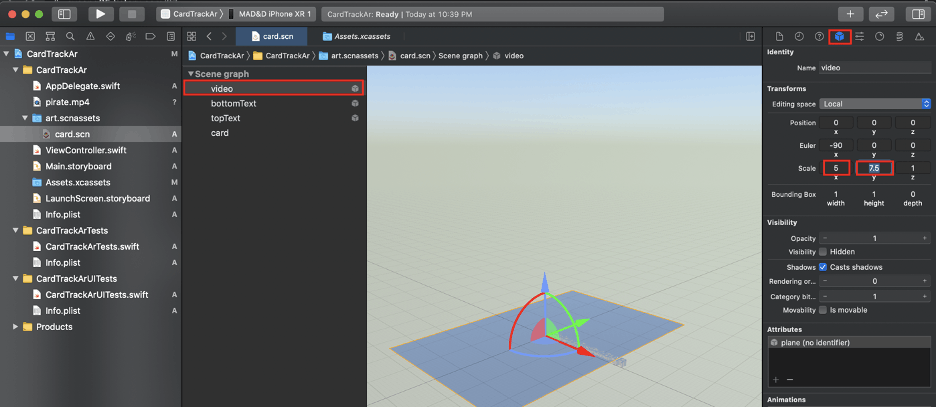
Thirdly, we will add a plane object. Its role is the area of the card detected and of the video clip that will play. We will change the name of the plane object from ‘plane’ to ‘video’. Euler angle of the x-axis of the plane object will be changed from 0 degrees to -90 degrees. These two activities will be conducted in the way of the first text object.
And then, we will set the size of the plane object named ‘video’ as the same size of the card image stored in the AR resource.
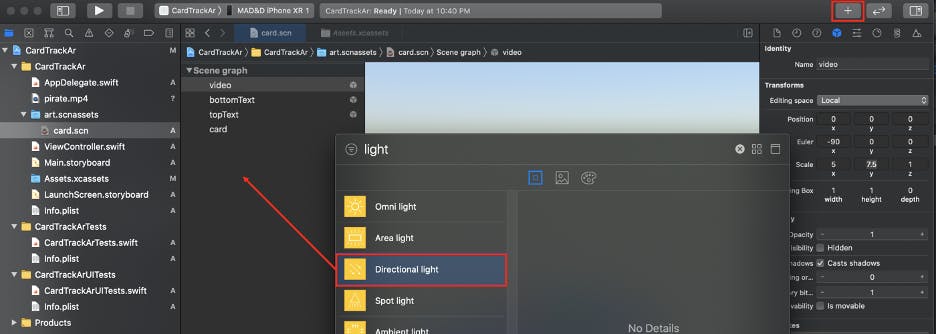
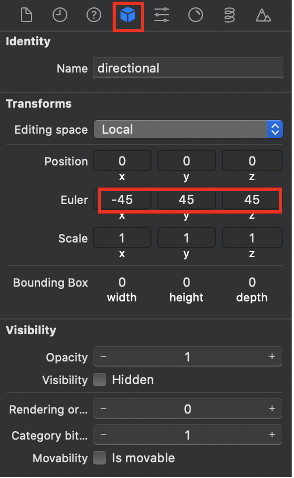
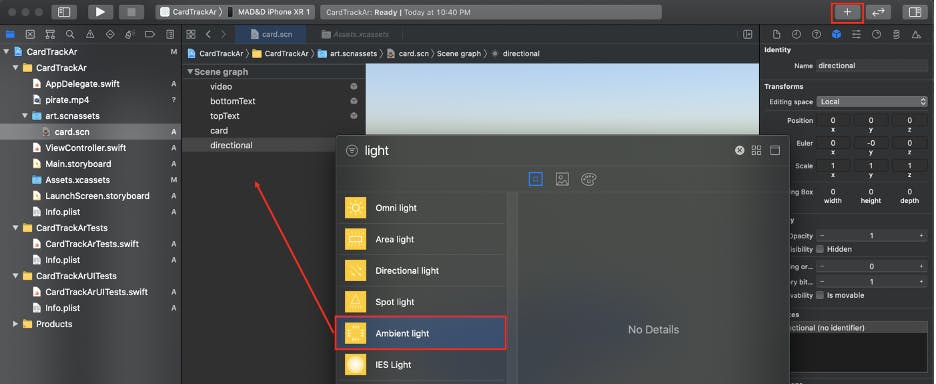
Fourthly, we will add directional light and will change the Euler angle on the x-axis, the y-axis, and the z-axis to respectively -45 degrees, 45 degrees, and 45 degrees.
Lastly, we will add ambient light.
We finished adding 5 objects.
Now we need to adjust the hierarchy and position of objects.
We will drag 5 objects into the empty node named ‘card’.
We can adjust the position of two text objects by using axis.
How to adjust the position of the object by using axis is to click each axis and to drag each axis.
In the picture below, the red arrow is the x-axis, the green arrow is the y-axis, and the yellow arrow is the z-axis.
Let’s click the first text object and drag the green arrow and the red arrow in order to position the first text object bottom of the plane object named ‘video’.
Let’s do the same activities for the second text object.
And then, we will change the color of text objects to red. Let’s click the text object, change the color in the way below. Let’s do the same activities for another text object.

Finally, we have finished setting resources for AR programming. It’s time to implement codes of recognizing the card image and showing objects on the card.
Step5: To implement codes to recognize the card image and show objects on the card
The flow of code is the following: To instantiate card.scn -> To create a session configuration in order to detect the card -> If the card is detected, the video clip with two sentences, 'Weclome CardAR' and 'It's my first AR', is played automatically.
(1) To instantiate card.scn
    override func viewDidLoad() {
        super.viewDidLoad()

        // Set the view's delegate
        sceneView.delegate = self

        // Show statistics such as fps and timing information
        sceneView.showsStatistics = true

        // Create a new scene in order to instantiate card.scn
        let scene = SCNScene(named: "art.scnassets/card.scn")!

        // Set the scene to the view
        sceneView.scene = scene
    }
(2) To create a session configuration in order to detect the card
override func viewWillAppear(_ animated: Bool) {
        super.viewWillAppear(animated)

        // Create a session configuration in order to recognize the card
        let configuration = ARImageTrackingConfiguration()
        guard let arReferenceImages = ARReferenceImage.referenceImages(inGroupNamed: "AR Resources", bundle: nil) else { return }
        configuration.trackingImages = arReferenceImages
        sceneView.session.run(configuration)

        // Run the view's session
        sceneView.session.run(configuration)
    }
(3) If the card is detected, the video clip with two sentences, 'Weclome CardAR' and 'It's my first AR', is played automatically.
   func renderer(_ renderer: SCNSceneRenderer, didAdd node: SCNNode, for anchor: ARAnchor) {
        guard anchor is ARImageAnchor else { return }

        guard let card = sceneView.scene.rootNode.childNode(withName: "card", recursively: false) else { return }
        card.removeFromParentNode()
        node.addChildNode(card)

        card.isHidden = false

        let videoURL = Bundle.main.url(forResource: "pirate", withExtension: "mp4")!
        let videoPlayer = AVPlayer(url: videoURL)

        let videoScene = SKScene(size: CGSize(width: 720.0, height: 1280.0))

        let videoNode = SKVideoNode(avPlayer: videoPlayer)
        videoNode.position = CGPoint(x: videoScene.size.width / 2, y: videoScene.size.height / 2)
        videoNode.size = videoScene.size
        videoNode.yScale = -1
        videoNode.play()

        videoScene.addChild(videoNode)

        guard let video = card.childNode(withName: "video", recursively: true) else { return }
        video.geometry?.firstMaterial?.diffuse.contents = videoScene
    }
The whole sources can be found below. Thanks Professor Vladimir for sharing the sources. I hope it will help us enjoy AR programming in iOS.